Archives for category: photographs

IMG_1688
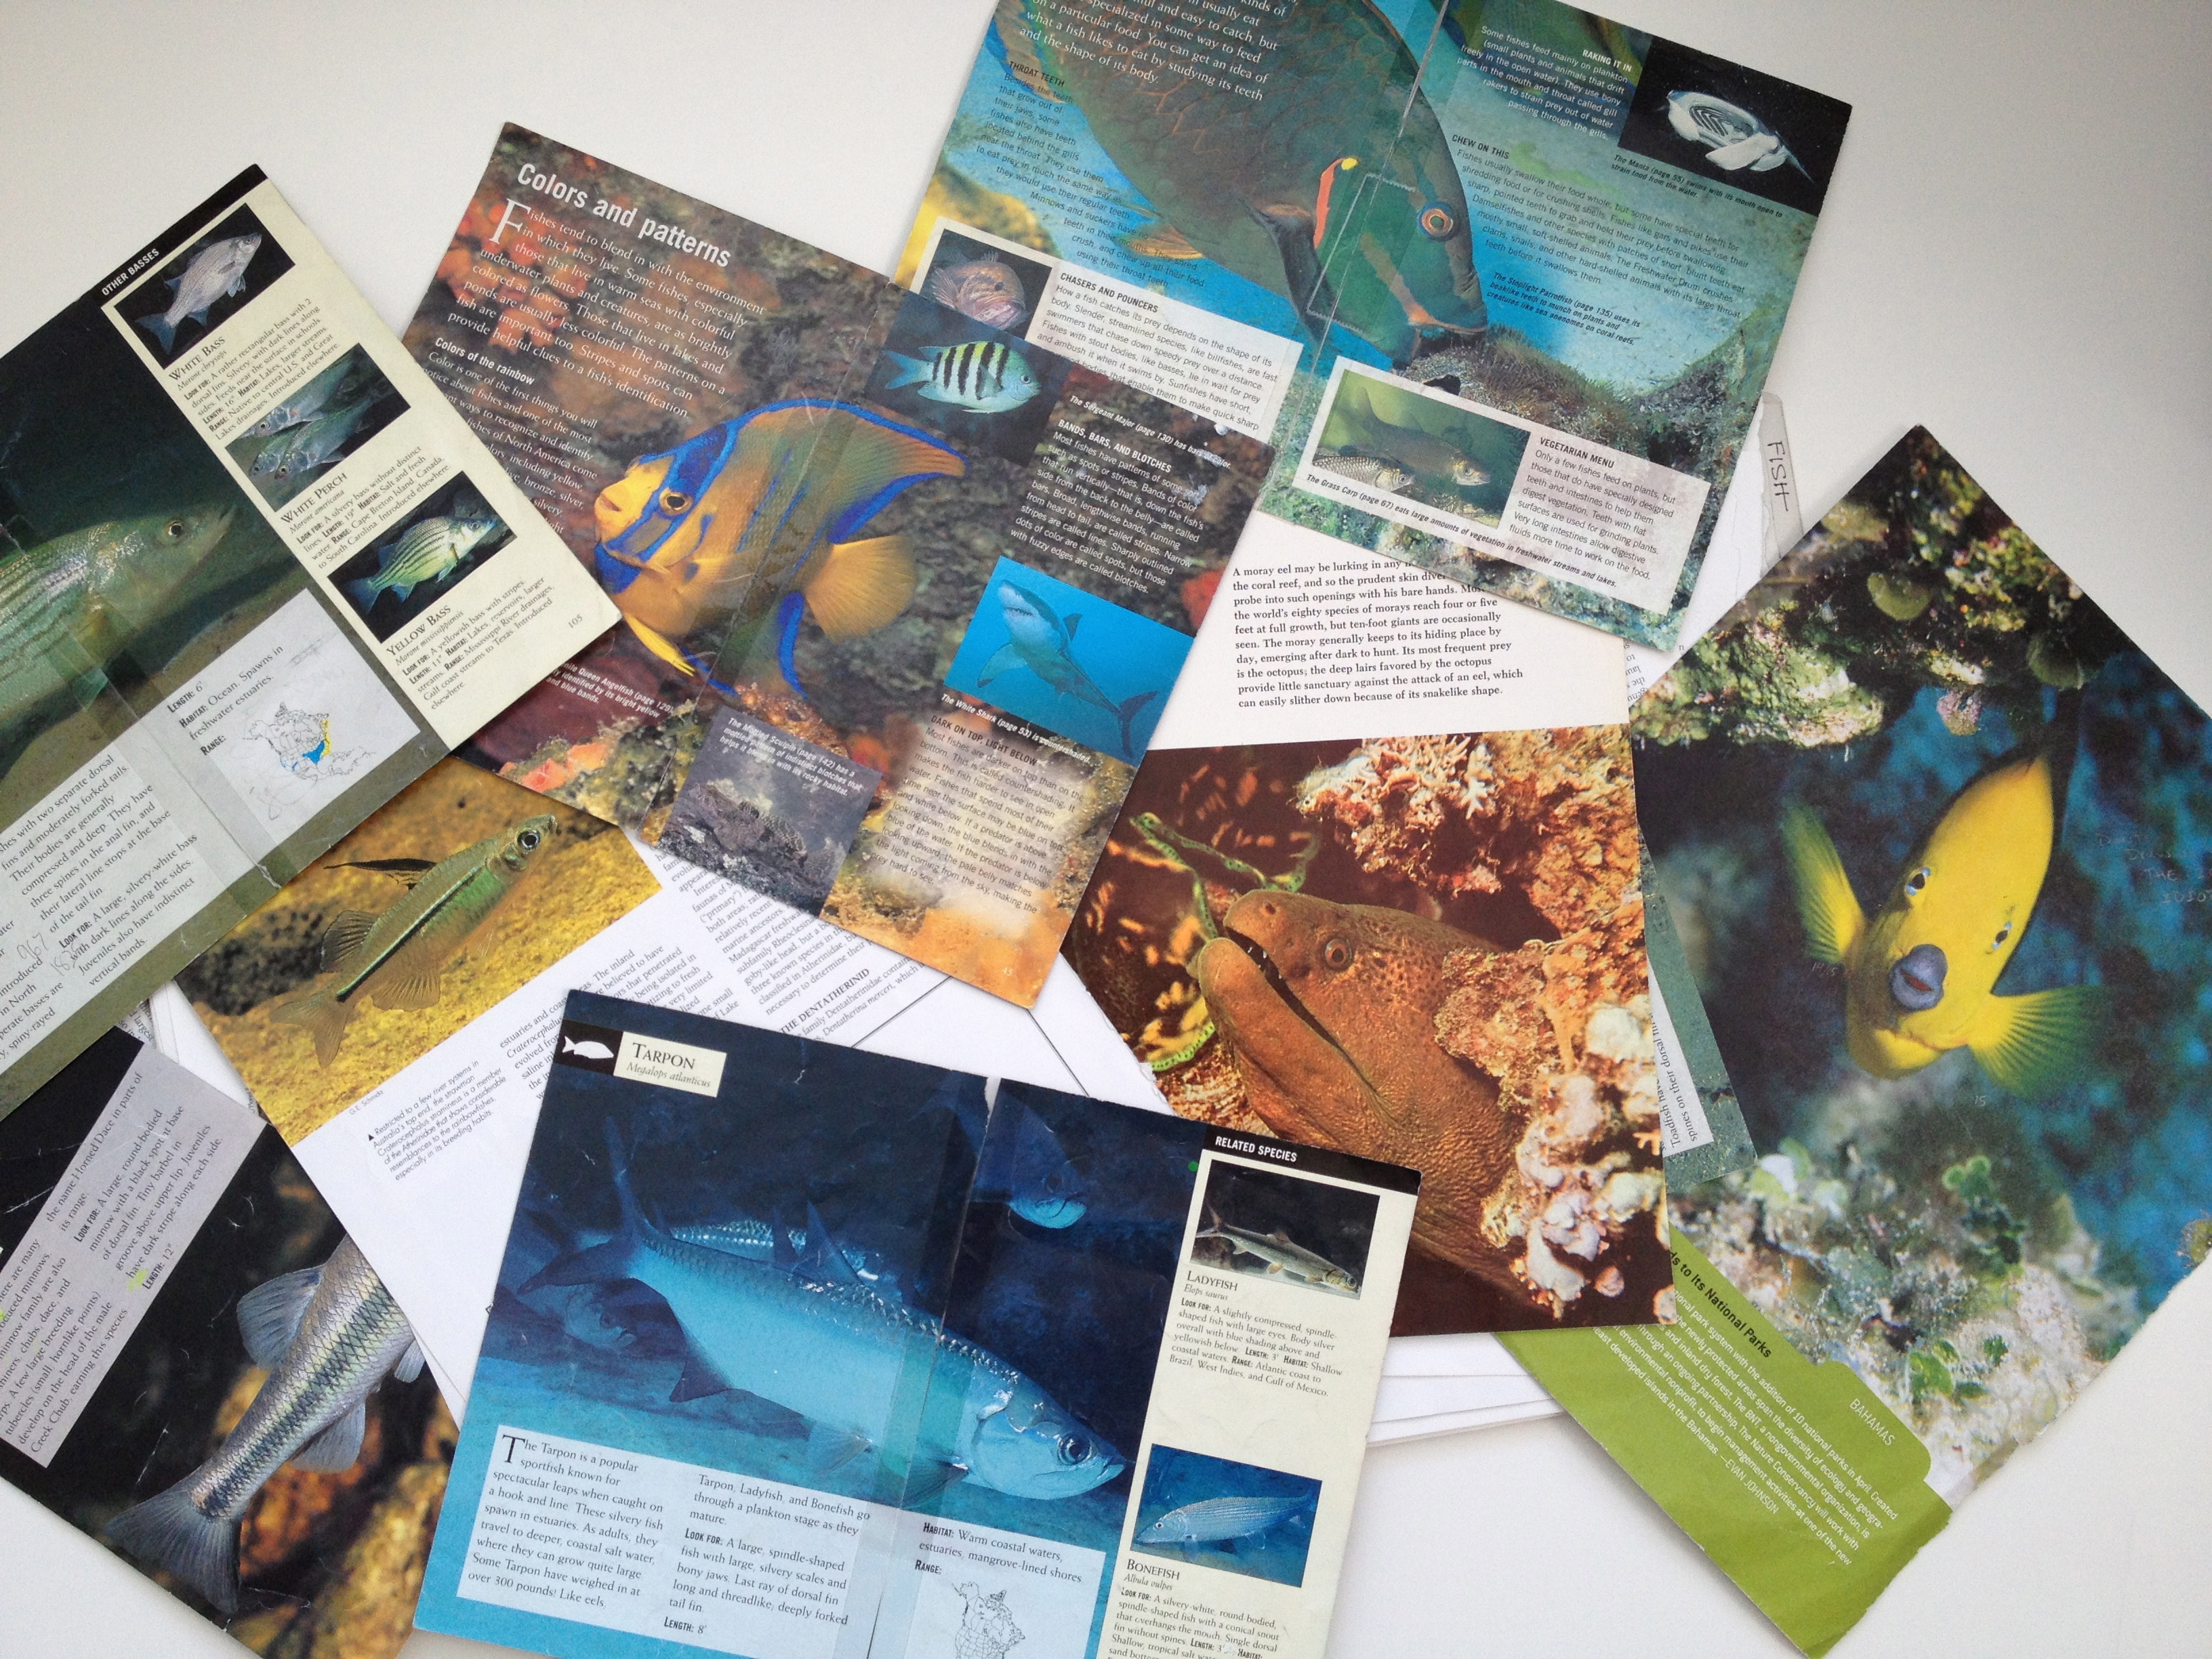
In my last post, I talked about the importance of having images available to your students for use as visual references when having the real thing in front of them just isn’t possible or practical. Today I’d like to help four lucky people get started on the creation of their own image files by giving away some beautiful National Audubon Society field guide books. (These books are brand new and cost about $20 each.) Each of these books is full of gorgeous, full color photographs that will make excellent reference images for any artist. Each book is focused on a different subject group — one for reptiles & amphibians, one for mammals, another entitled fishes, and finally one for insects & spiders. The pages measure about 3.5 X 7.5 inches, so if you tear them out as I suggested in my blog post, they will fit neatly into a file folder for easy retrieval and distribution later.

If you’d like to receive one of these spectacular National Aububon Society field guides, just leave a comment on this blog post. The first 4 people to leave me a comment by Wednesday, February 20, 2013, by 5 p.m. (PST) will each get one free book. (Subject of the books vary and cannot be specified by the recipient. One comment/entry per person, please.)

And teachers… don’t forget that spring break will be here before you know it. Plan your professional development now by checking out my affordable and convenient art courses offered through Fresno Pacific University. Registration is always open for these distance learning courses — you can view all of my course listings here. No art experience? No Problem! My courses were written specifically with YOU in mind! Imagine yourself completing the units you need on your schedule, from the comfort of your own home. I’d love to see you in class!

Advertisement

IMG_1679For many of us, creating something is much easier with some sort of visual reference. Whether we’re making a drawing, a painting, or a sculpture, having something in front of us to look at helps us get the details right. It helps us with things like proportion, texture, pattern, and color. Here are a few easy suggestions that will help you establish a valuable set of image files that your students can use again and again when they need a visual reference. Why the need for such files you ask? Well, if one is drawing a rose, for example, it’s not too difficult to simply bring one into the classroom. The same holds true for any number of fruits, vegetables, and small objects. But what if your students are trying to draw or sculpt say, an elephant, or a particular type of fish? Not so easy. Enter the image file.

My suggestion to you is that you create a series of files filled with photographs that your students can reference as needed. I want to be very specific here about saying that your images files should contain only photographs — not drawings or paintings of things. The problem with using drawings or paintings of things as a reference is that someone else has already made all of the decisions about color, line, texture, etc. When you have your students work from photographs, they must decide how to interpret the “reality” of that photo into their work. This involves a tremendous amount of observation and problem solving skills that are essential to student growth and learning.

For my own classroom files, I purchased some very inexpensive books of photographs of whatever I was looking for. (Yard sales can be a fantastic source!) Because having an entire classroom of students share one book is not practical, I simply tore the pages out of the books I collected. (As a lover of books, this was kind of hard to do at first, but I persevered and it worked so well, I never looked back.) I used hanging file folders to store these now single sheets of photos, and labeled them by category such as, insects, fish, mammals, reptiles, birds, flowers, etc. (Often these photos also have an accompanying paragraph about whatever is in the photo, which I find to be a real bonus as far as student learning is concerned.) Once these files are established, it’s simply a matter of pulling them out when you need them. So for example, if you’re working on an art project that involves reptiles, you simply bring out the reptile file and you’re all set. If only one topic is being used, I simply spread out that file’s contents on a table for students to peruse. If we’re using multiple subjects, I place the files we’re using in a small hanging file container someplace where the students can look through them.

When I initially set up my image files, the internet was not something we had access to in classrooms. And while it might be tempting to let students search for images on the computer, I would advise against it. In my experience, students will make a selection from this type of photo file within a minute or two of looking over the photographs. How long do you imagine they might look on the internet…?

Trust me that after only a small initial investment of time and money on your part, you will end up with files that will serve you well for years. You won’t be able to imagine how you ever lived without them!

Need other ideas for great art experiences YOU can do in your classroom or with your homeschooled kids? Check out my affordable and convenient professional development courses here. You can register at any time for my distance learning classes, and best of all, you complete them on your schedule. I hope to “see” you in class soon!

IMG_1659What better way to show we love the earth, than by creating some gorgeous Valentine’s Day inspired art work that encourages recycling as well?! Enter “Giant Stuffed Paper Hearts”.

The materials for this spectacular art experience are outrageously simple. You will need butcher paper, “stuffing”, a stapler, any sort of decorative materials, glue, and string or fishing line. (If you have access to butcher paper in “Valentine” colors like pink, red, and purple, that’s great. If not, white and even black will work just as well.)

The idea here is that you are going to have your students cut giant — and I do mean giant — hearts out of butcher paper, decorate them, stuff them, and then hang them from the ceiling. (If your school won’t allow you to hang anything, these could just as easily be stapled to a wall where they will still look puffy and three dimensional.)

While you could use anything for the stuffing of the heart, this experience presents a perfect opportunity to talk about things like recycling, and campus beautification. If you are so inclined, you and your students might walk around the school yard collecting trash and bits of paper. (Gloves might be a good idea here.) Or maybe you could use paper from your own classroom that would normally be thrown in the trash? Newspapers collected from home work well here too. The point is, this art experience is tangible evidence that trash can be transformed again into something else — in this case, into something beautiful.

When cutting out their paper hearts, each child will need two hearts exactly alike, so you can show them how putting two pieces of paper together and cutting them out at the same time will accomplish this. (An alternative to this would be to have them cut out one giant heart, then trace that on to their second piece of butcher paper and then cut that one out.) Depending on how involved you want them to get, and on how you plan to display them, you can instruct your students to decorate only one side of one of their hearts, or one side of each of their hearts. I would really let them go wild here with lots and lots of different decorative materials. Things like paint, construction paper, tissue paper, crepe paper, glitter, lace, ribbons, yarn, buttons, cotton, etc. would all be super fun for the kids to work with. (Because the hearts are large, I would probably not put out any drawing tools for this one, as any drawing the children might do would tend to be small, and the surface decoration for these should really be bold and large.)

Once all surface decorations are finished and have been allowed to dry, place the two hearts together and begin stapling around the edge to connect them. (Staple at least one inch or so in from the edge.) Remember that if you had students decorate two sides, make sure each of those decorated sides face out, and that the plain sides are on the “inside”. After you’ve stapled about half way around the hearts, you may begin stuffing the heart with very loosely crumpled paper or trash. You want to keep these hearts very light, so there’s no need to stuff them full of tightly wadded paper. Use just enough lightly crumpled paper to “fill out” the heart and give it a puffy shape. Finish stapling the remainder of the edge to close the heart, and you’re done. The resulting hearts should be very light, so it will be easy to hang them from your ceiling if you choose to do so. Don’t worry about hanging them at the same height, because hanging them at different heights adds to the fun. You will be amazed at the magnificent display these create and your students will love them!

Share the love! If you decide to do this art experience with your students, I’d love to see the results. Email photos to me at JGomasFaison@gmail.com and with your permission I might even share some of your photos on this blog. Happy heart-making!

While counting your blessings this Thanksgiving, my hope is that you will also take time to notice the many little artistic miracles that surround you, such as vibrant color, rich textures, interesting shapes and forms. When you begin to pay attention, life can truly be a feast for the senses each and every day.

Happy Thanksgiving!

At long last — summer is here!

If school is finally out for you, I hope you are enjoying some well deserved rest and relaxation. Teaching is an incredibly demanding profession, and there’s nothing like spending some time doing things you enjoy to recharge your batteries. Look around you. Really see the beauty that this season has to offer. Maybe you’ll write some thoughts down in a journal or notebook… maybe you’ll take some photos… maybe you’ll even try drawing a little sketch or two of something you see in your environment.

Whatever you choose to do… really do it… completely. Savor it! Make relaxing and recharging yourself this summer into an art form.

P.S. And if you find yourself in need of some Professional Development credits, have fun earning them while taking one of my art classes offered through Fresno Pacific University. Learning from home on your schedule… what could be easier? Click on the link above to find out more.

Very often I’m asked by students and teachers if it’s acceptable to look at something as a reference while they are creating. My answer is always yes. I don’t think it’s realistic to expect students  — or anyone for that matter — to be able to recall exactly what any given thing/animal/place, etc. looks like from memory. Using some sort of visual reference is a great support for the creative process. But here’s the thing… I think it’s imperative to make a distinction between the different kinds of visual reference materials available.

Of course working from life is the best of the best. But if one is trying to recall the facial details of a lion, for example, getting a peek at the real thing might not be possible or practical. As the next best thing, I strongly suggest using photographs — as opposed to drawings — when some type of reference is needed.

The reason I prefer photographs over drawings is simple. If I want to draw a flower for example, maybe even something like those pictured above, by using a drawing that someone else has done as my reference, all of the decisions have already been made for me by the person who created that drawing. Things like, color, shape, shadows, highlights, details, and on and on, have already been determined by the artist who drew that flower. By using a photograph for reference, everything is there for me — all of the visual information, and I — as the artist — can make the decisions for myself about what I want to include, add, or leave out of my piece as it suits me and my creative experience. The interpretation of that photo is mine and mine alone as I create.

As a classroom teacher, I would purchase books on sale that were filled with color photos of all kinds of things… birds, reptiles, mammals, fish, flowers, you name it, and then tear the pages out and keep them in files. This made it easy to pull them out and allow students to sort through them and find what they were looking for, and then take the individual photo(s) back to their desk to reference while they worked. Having computer access in the classroom provides a virtually limitless source of reference photographs as long as students can find what they need quickly without being distracted.