Archives for category: 3-D Art Lesson

OLYMPUS DIGITAL CAMERAIt’s hard for me to believe that January 2014 is almost over, and I’m wondering if you feel the same way?

Believe it or not, Valentine’s Day is coming up fast, so I thought I’d share some easy-to-implement art lessons that would be lots of fun to do with your students. With a minimum of supplies and no art background or art teaching experience necessary, these lessons really are a must-try for virtually any grade level. (Just modify to best suit the age and ability levels of your students.)

IMG_2538
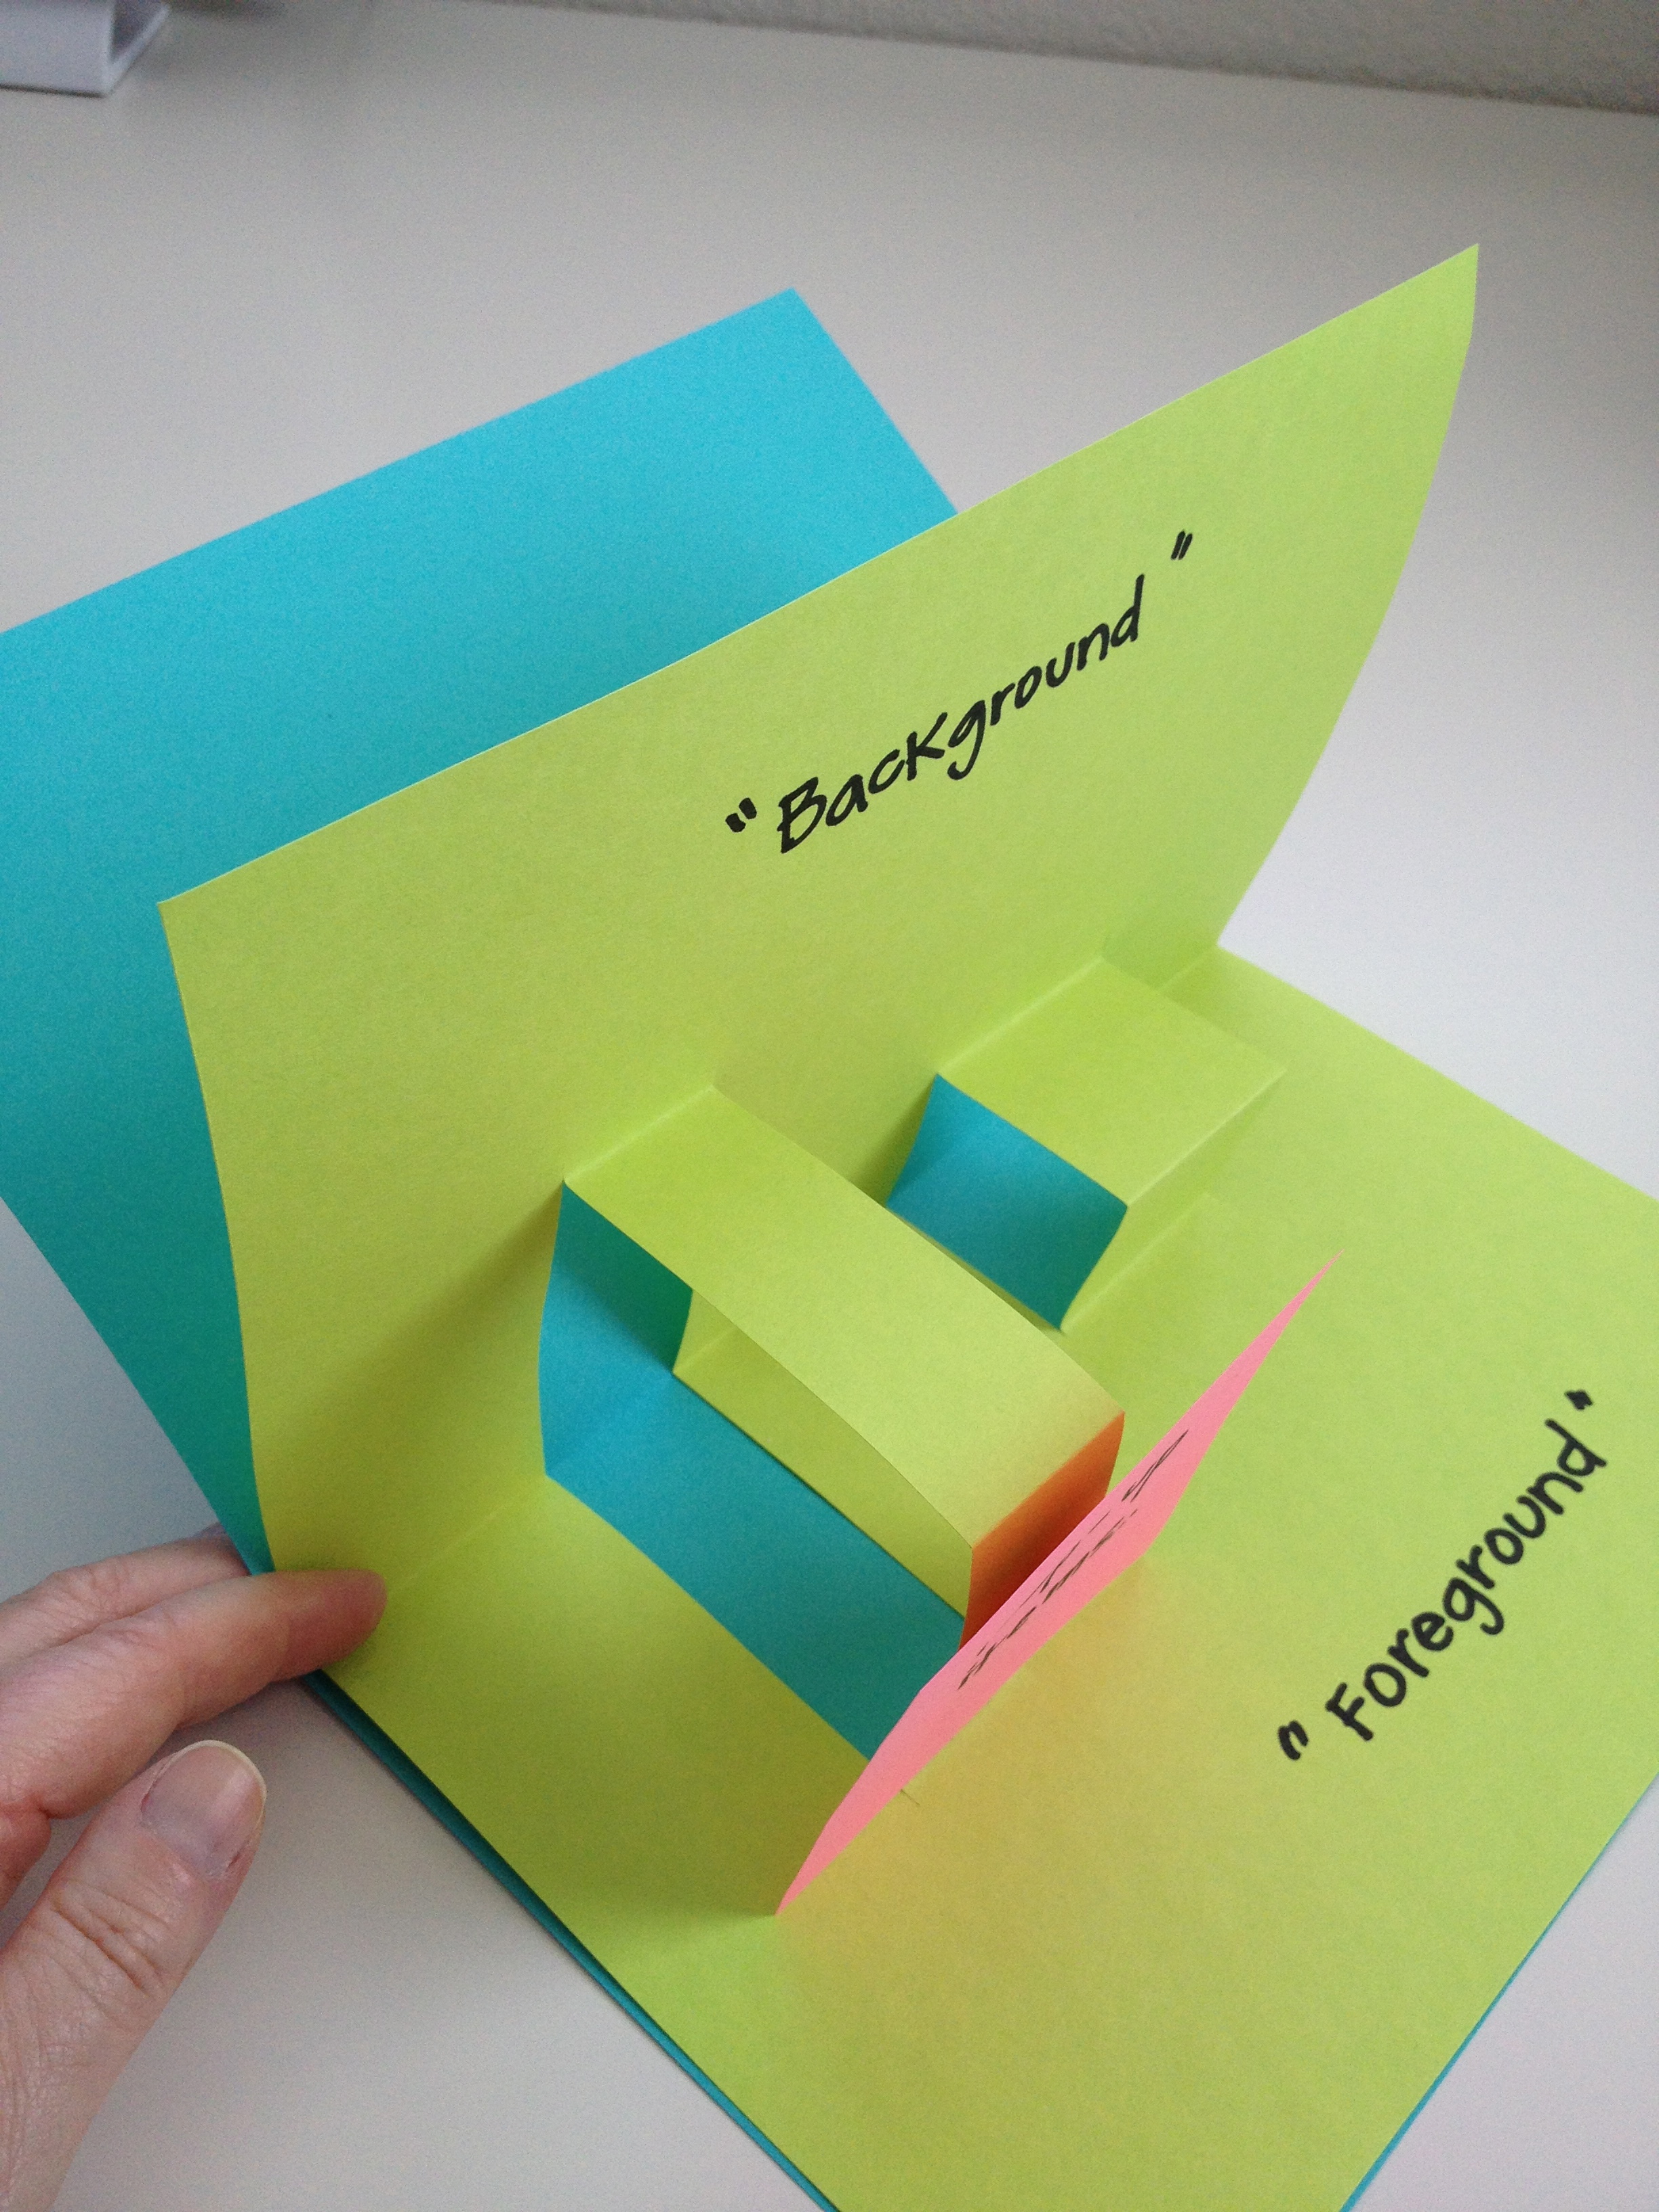
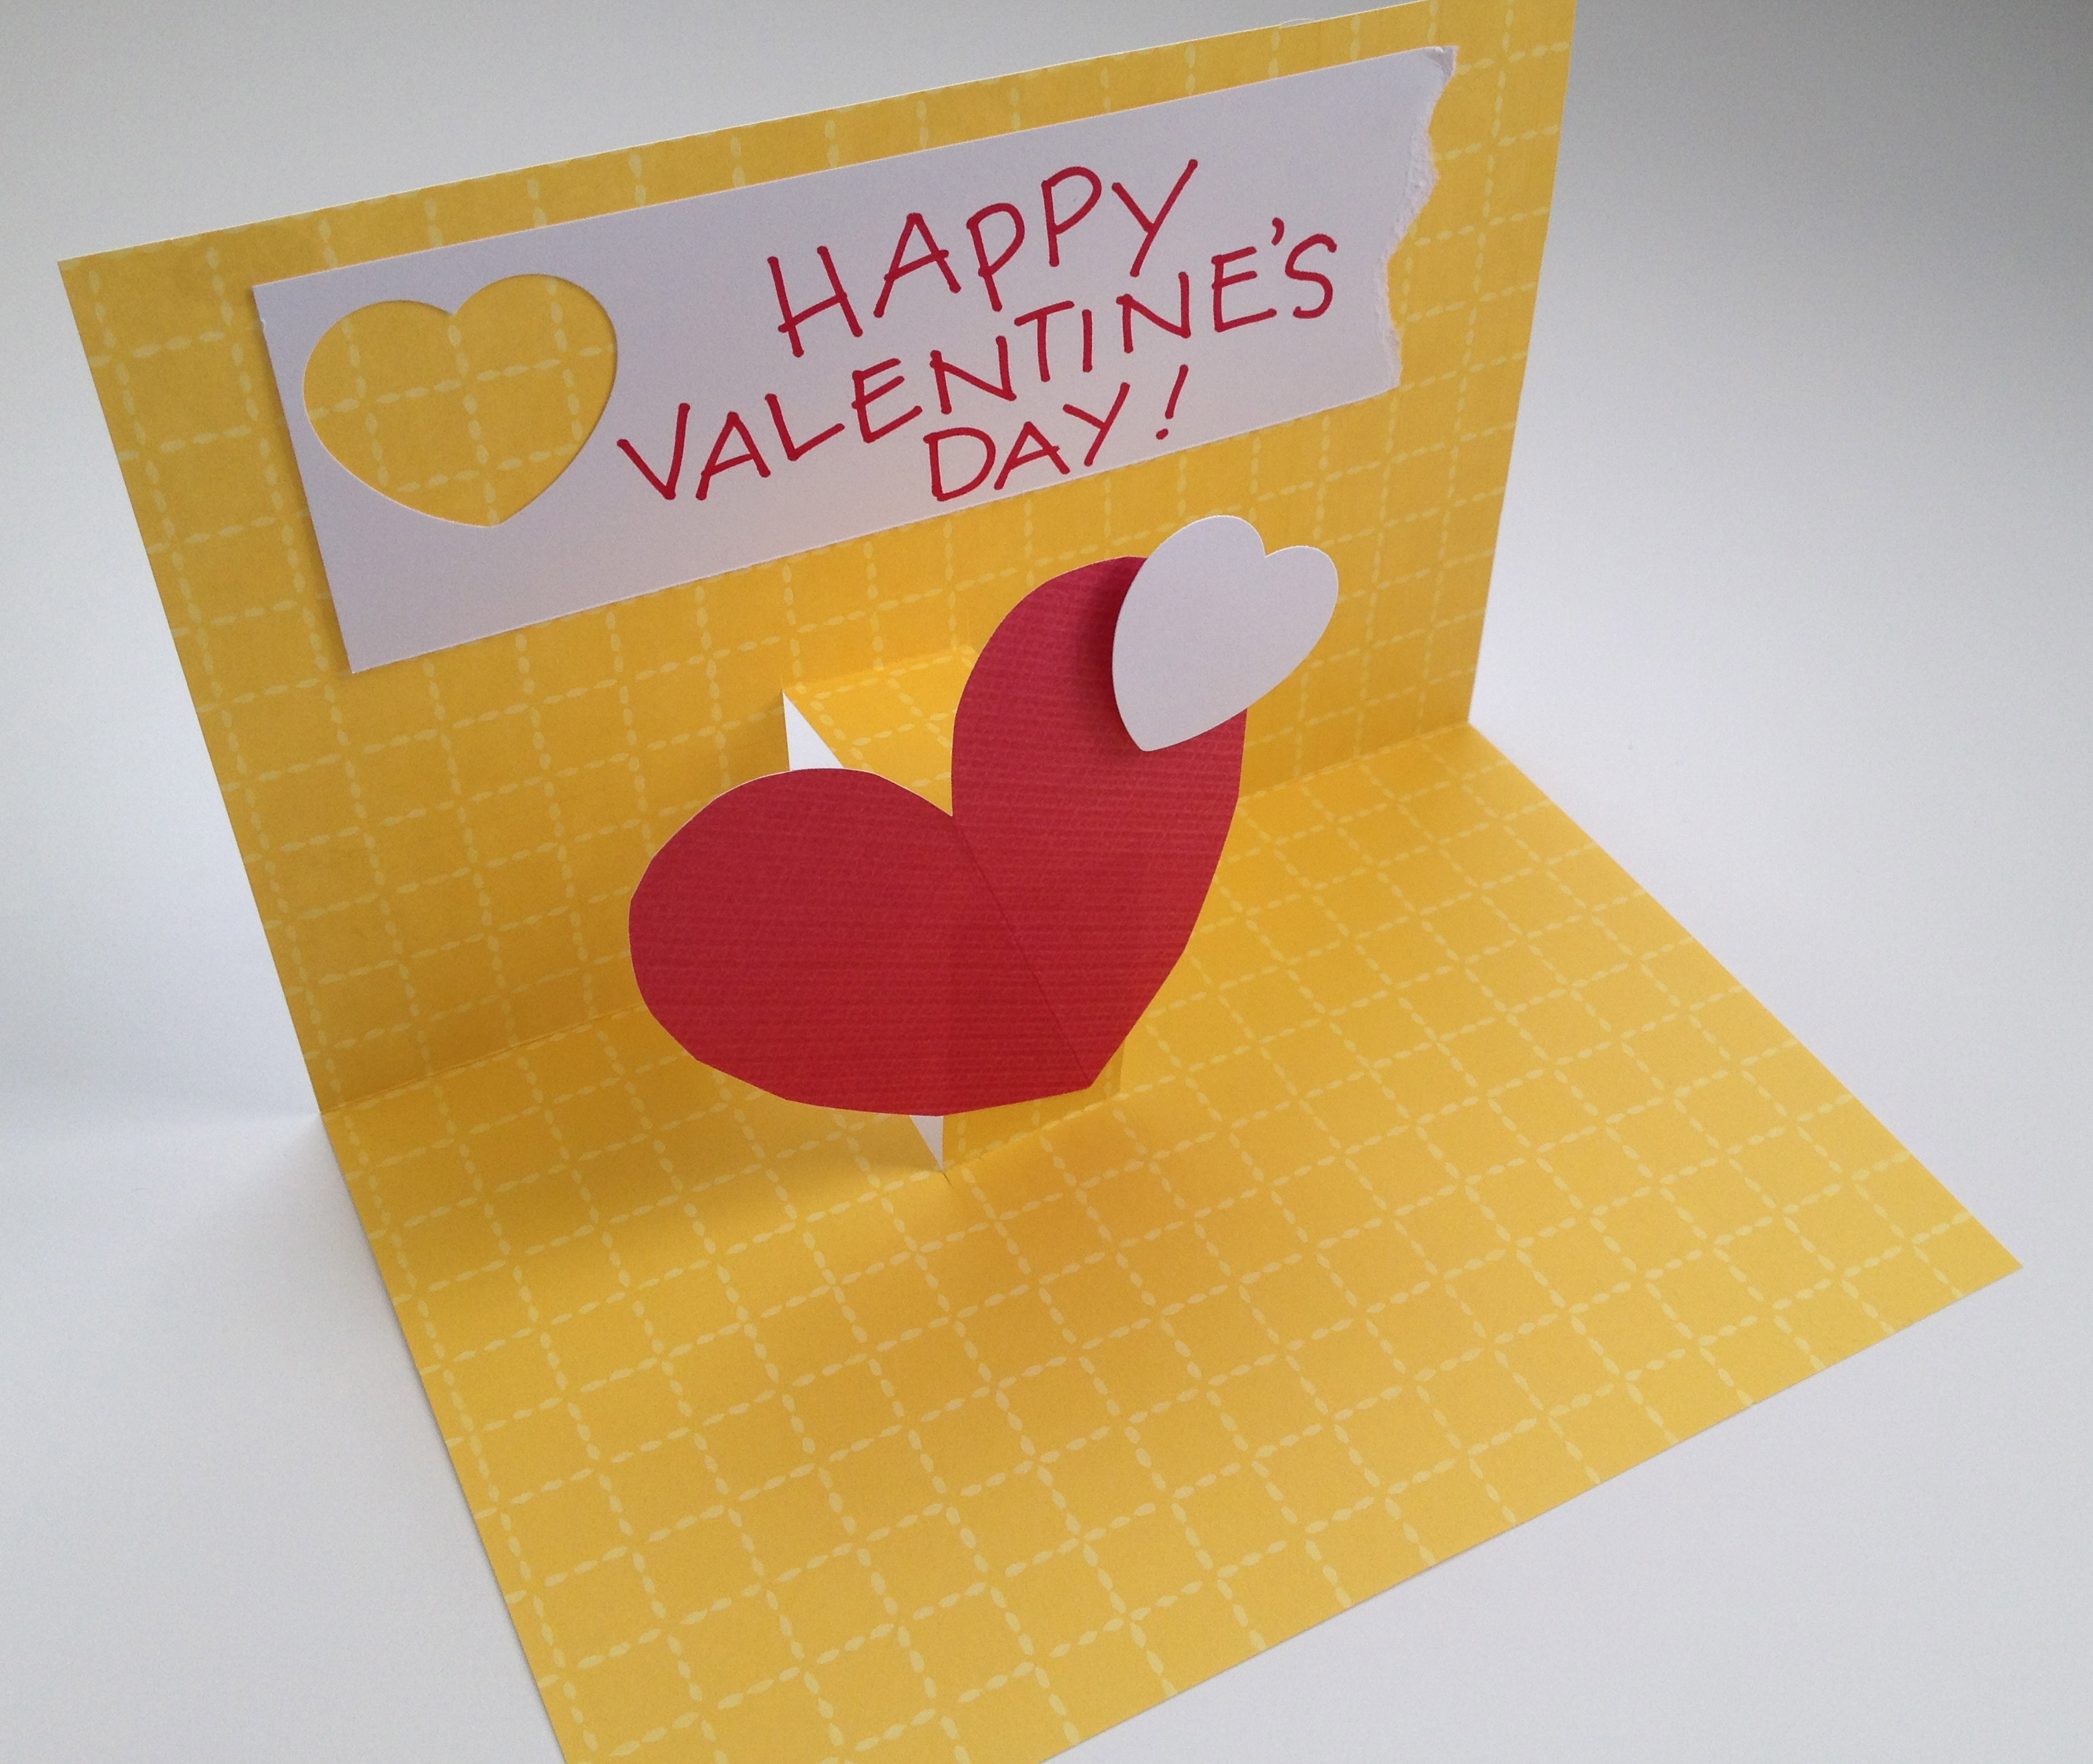
The first one involves making little three-dimensional pop-up cards or books. If you have your students make cards, they would make wonderful gifts to people in retirement homes, senior citizen residences, or even hospitals in your community. And what about servicemen and women? Think how much a handmade card of caring and gratitude would mean to them. The real-world connections here to language arts and social studies are both meaningful and profound. Making little pop-up books would be fun too, it just depends on how involved you want to get. You can read all about this fun lesson here.

IMG_1659The next lesson idea takes you step-by-simple-step through the creation of Giant Stuffed Paper Hearts, and you can get all the details in a previous post by clicking here. Not only will the resulting hearts make fabulous decorations for your classroom, school site or even district office if they’re so inclined to let you decorate, but you will have helped the environment by cleaning up trash or by recycling paper that might otherwise have ended up in a landfill.

IMG_1649And finally, how about having your students create some fun little Valentine heart bouquets? Read all about this lesson here. Again, these would be perfect for your students to make for someone special. This could be one of the community groups mentioned above, someone at your school site, their student buddies, or even someone at home. In my experience, students LOVE making things to give away and will likely extend even more effort than usual on a piece that they know will be a gift, so be sure to determine the recipient(s) ahead of time and let your students know who they’re creating their artwork for. The excitement this generates is inspiring! Have fun with these, and let me know how it goes. I’d love to hear about it if you use one or more of these lesson ideas in your classroom.

Advertisement

IMG_1809With graduation season upon us, and another school year drawing to a close, this is a great time to help students think about where they’ve been, where they are, and where they’re headed. The “My Life” pop-up book is a small, three-section book that invites students to think about significant events/people/places from their past and present, and to imagine their future. Breaking the book down into these three main time-frames will enable your students to more easily focus on significant details without being overwhelmed.

Here’s what you’ll need: Sheets of 9×12 inch construction paper in a variety of colors, construction paper scraps, scissors, tape, staples, glue, and markers. You might also want to include other materials such as brads, cotton, yarn, buttons, ribbon, string, fabric scraps, hole punches, and construction paper sheets larger than 9×12.

Each child will ultimately need 6 sheets of construction paper — 1 sheet for each of the three pop-up sections, and 1 “backing sheet” for each section. Because this book will consist of 3 separate sections, students may begin on any section they choose — past, present, or future. After all sections are complete, the book may be assembled in the correct order.

Begin by demonstrating how to make a simple pop-up tab. Fold one sheet of 9×12 inch construction paper in half, and make two parallel cuts along the folded edge for each pop-up tab you want to have, like this:

IMG_1790

After cutting, open your paper, and push the tabs you just cut to the “inside” of your folded paper. Close the folded paper with your tabs inside. When you open the folded paper back up, your tabs should stand up like this:

IMG_1791

Elements that will pop-up when the book is opened will be attached to the front of these “tabs”. Encourage your students to get fully involved in the surface decoration of each section of their book using construction paper scraps and any other materials that you have provided. For example, if their own birth is the significant event from their past that they want to represent, perhaps they will have a small crib as one pop-up element, with another being a large cut-out of the numbers for the year they were born. The “background” of the scene could be decorated like a wall in the baby’s room, and the “foreground” area decorated like the “floor” of that room. In other words, encourage the creation of entire settings or scenes to fully represent their significant event/place/person, etc.

IMG_1797

Depending on the age and ability levels of your students, a bit of writing for each section can be included to add depth and description to what they’ve created visually.

After a section is complete, a second sheet of construction paper should be folded in half and attached to the back of the section sheet like this:

IMG_1802

Once all three sections — and their backing sheets — are finished, the sections can be connected together using staples, double-sided tape, or glue. (Hint: you’ll need to be very patient if you use glue!) If you desire, you can have the students decorate the “cover” sheet of their book. For a more finished look, you can wrap a larger sheet of construction paper around the outside of all three sections of the book, and after attaching it, trim off any excess. (A 9×12 sheet won’t be large enough once you’ve connected all three sections of the book together.) This then can be decorated as the cover.

Not only will you learn a great deal about your students during this process, but they will love sharing the highlights of their lives with you and with their friends.

Interested in more fun art ideas like this one? Check out the affordable, self-paced, and convenient professional development art classes I teach through Fresno Pacific University here!

IMG_1778It’s never too early to encourage students to begin thinking about careers that interest them. This simple, yet powerful art experience called “Career Cubes” is a fun way to do just that, while incorporating critical thinking, writing and even a little research if you desire.

You will need the following materials: Light-weight cardboard — used file folders work great here, masking tape, construction paper scraps, scissors, glue, color pencils, crayons, and markers. Additionally, things like yarn or string, staplers, brads, and discard magazines could also be included.

Each child will need 6 light-weight cardboard squares. They can be any size, but I’ve found 4 inches by 4 inches to be a nice, workable surface. Depending on the age and ability level of your students, measuring and cutting out their 6 squares can be great math practice. You could also provide a template for tracing, or you could provide the squares to them already cut out. (The more carefully the squares are measured and cut, the better the resulting cube will fit together.)

The reason 6 individual squares are used, rather than a “cube pattern”, is that the separate squares provide a more challenging set of 6 individual compositions, and a more interesting approach to cube construction.

I would suggest deciding ahead of time what your expectations are for each side of the career cubes. (Your specific requirements for your students will vary greatly based upon the age and ability levels of your students, but even for the very young, I would be sure you have some sort of guidelines established for them.) For example, if your students are older, you might require the following: One side devoted to “naming” the career, three sides will be visual representations of that career, one side will be a written statement about why the student has chosen that career — or is interested in that career — and one side devoted to some basic research on the career such as schooling required, etc., for a total of six sides.

Before handing out the first square, encourage discussion and brainstorming about what types of careers your students are interested in. Talk with them about how different careers could be visually represented… for example, what sort of symbols might one make if they wanted to become an architect? A nurse? Make a list if you like of the many possibilities your students come up with. After you feel your students have been sufficiently motivated, concentrating on only one square at a time, have your students begin the process of surface decoration. Depending on your available art supplies, the squares could be decorated with a variety of materials, or you might limit them to just using cut and/or torn construction paper. The choice is yours. If you decide to require a written component, you might like students to write in their own best handwriting, or perhaps you’d like them to write and compose something on the computer that they can attach to one square. Depending on your schedule, you might have students work on this in one, uninterrupted block of time, or perhaps you might break the process into smaller, shorter work sessions. (Squares, along with bits and pieces, can be easily stored in ziplock bags while in progress.) Lots of options here to make this work for your students, your curricular objectives, and your time frame.

When all 6 sides of a student’s career cube are complete, the cube can be constructed. First, lay out four sides. Be sure to leave a small amount of space between squares to serve as a “hinge”, and tape with masking tape like this:

IMG_1779

IMG_1780Then attach the remaining two sides to the four you just taped like this:

IMG_1782Now bring all sides together to form a cube and tape securely.

IMG_1785Masking tape used neatly on the “outside” of the cube is fine and can become part of the surface decoration. Once complete, each student will have created a unique, concrete representation of his or her desired career choice. Career cubes are fun displayed individually on student desks, stacked up as a group, or can even be hung from the ceiling if you are clever. Your students will love not only making them, but looking at them as well!